We will be using Adobe Illustrator and Adobe Photoshop in tandem. Illustrator gives us great control over the layout and shapes we will need, and Photoshop give us the special effects we need to make the illustration look realistic.
1 First draw a frame in Illustrator using the box tool. Cut the ends at 45º angles. It helps to sketch out the moldings’ shape but it is not necessary. Draw one molding and use the copy/rotate tool to make the others. We can select the end points of our moldings to size them.
2 Next, use gradient fills to give the basic color, highlights and shadows. At this point it will have a kind of fake plastic look.
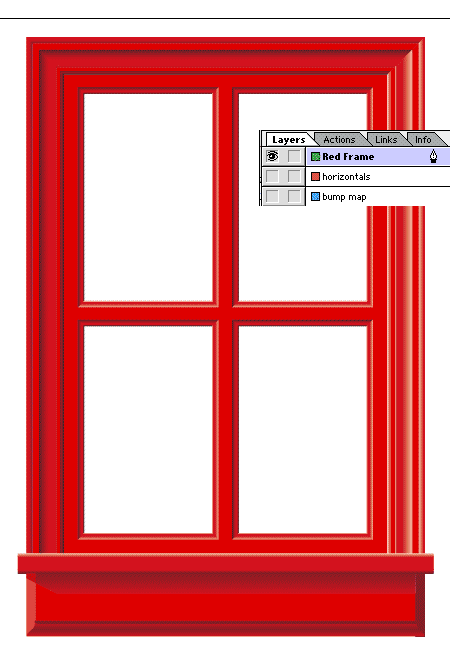
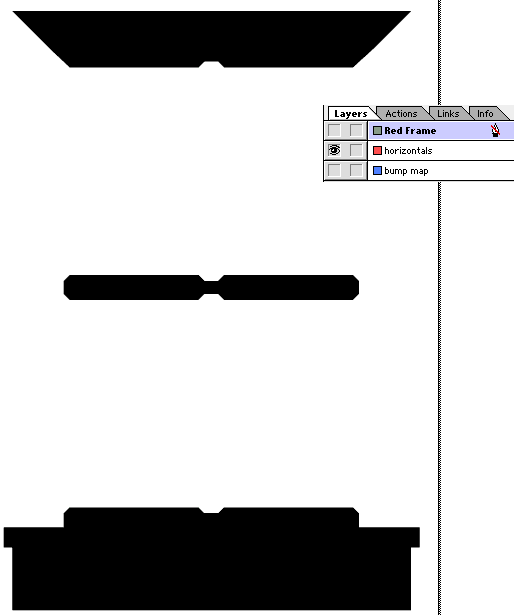
3 Now we will want to make some extra layers in illustrator to make the steps in photoshop easier. Duplicate the art on two additional layers. Call one “horizontals” and one “bump map”. In the “horizontals” layer, color all the horizontal bars black, and everything else white. We will use this to make selections in photoshop that line up exactly with our color art.
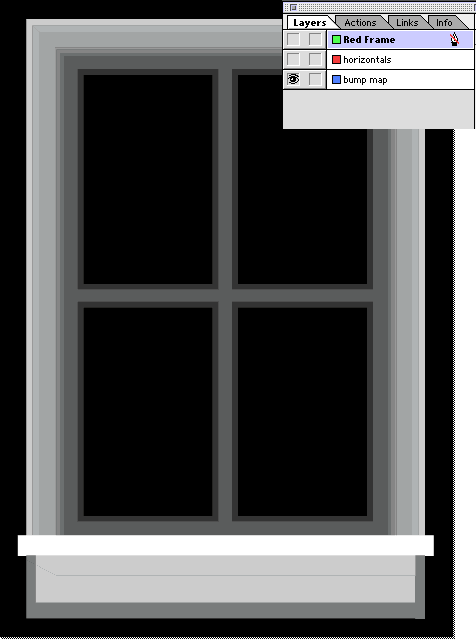
In the “bump map” layer you will do a black and white version but not with gradients. This will be used in the “Render/Lighting Effects” filter in photoshop to add dimension to the wood grain. Make the areas that you want raised lighter. You do not want to use gradients here, just shades of gray.
4 Use “File/Export” to save the illustration in photoshop format, layers and anti-alias should be checked.