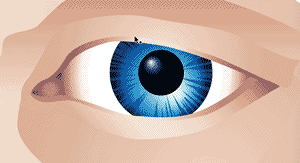
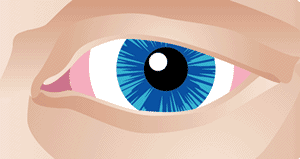
This tutorial is designed to get you familiar with using the pen tool, gradients, blends, clipping masks, pathfinder, and layers. We will be creating an eye for use in a Flash animation. Adobe Illustrator’s vector based drawing tools are well suited for use in Flash.
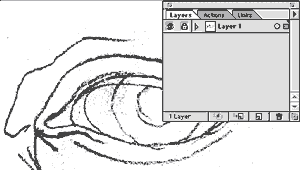
1 Start with a scanned sketch to use as a template. Place it on a layer by itself and lock the layer (click in the box next to the eye in the layers pallet).
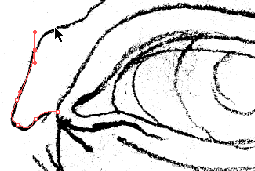
2 Next, create a new layer, and use the pen tool to draw the shape outlines on the new layer. Place your anchor points in areas between the curves in the line you are drawing, where the line is relatively flat. Click with the pen tool and drag out control points from the anchor point. These are “handles” that allow you to bend and shape your line. Don't worry if it is not a perfect fit, you can always go back with the open arrow tool, and move the control points to reshape the line. A good rule is to drag the control point in the direction of the curve, about 1/3rd of the way up the curve. Clicking and dragging produces a smooth curve, by holding the option (alt) key down while you drag, you create a corner point.
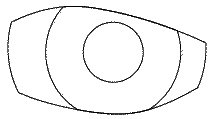
3 Now I'll introduce the Pathfinder (no it’s not for exploring Mars). This handy tool is great for creating shapes the fit together perfectly. Here I used the circle tool to make perfect circles (shift > drag), but I need them to fit in between the eyelids. Copy the shape of the eye opening and paste it in front of the circles. Think of the eye shape as a cookie cutter that you can use to cut off the excess circle. Select eye opening shape and one circle (with the shift key pressed, click on each shape).
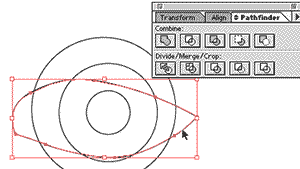
Use the “Intersect” button in the Pathfinder pallet to create the shape to fit into the eye. Note the pathfinder will delete original shapes, so be sure to have you “cookie cutter” saved somewhere (another layer or at least on the clipboard).
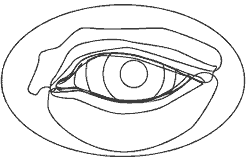
4 You should now have a drawing that outlines the basic shapes, highlights, and shadows. Note that not all the lines have to fit exact, the eyelid shapes overlap the eyeball and the flesh in the eye socket so the extra points and overlaps won’t show.
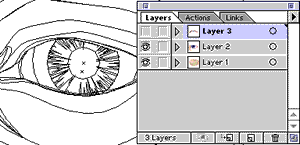
5 The next steps will be easier if the art is divided onto separate layers. Layer 1 (on the bottom) contains all the parts behind the eyeball. Layer 2 contains the eye and some of the shading around it. Layer 3 contains the eyelid, and all the parts that cover the eye.
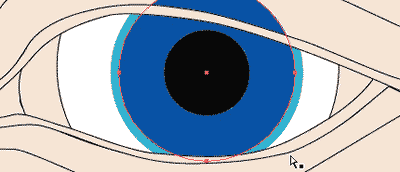
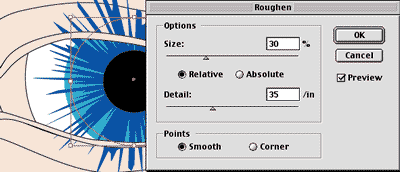
6 For the iris, draw another circle and use “Filter > Distort > Roughen”. Use a copy of the iris as a “cookie cutter” to make it fit the eye.
7 Using linear gradient fills, create the basic highlight and shadows areas of the skin.
8 Using radial gradients, create the dark areas on the iris and eyeball itself. You can use the gradient tool to place the center of the radial blend where you want it. Clicking with the gradient tool on the shape will place only the center point of the gradient, leaving the outside points intact, clicking and dragging will move the center point and outer points of the gradient. Experiment with this to get the radial gradient to look the way you want it. We will create shadows and highlights in part 2 of this tutorial.